Wednesday, 31 July 2013
I Heart Dublin
Lights DC - Leaving My Heart Behind from Mark Duggan on Vimeo.
#IHeartDublin #Mercenary #MercenaryGarage
Tuesday, 30 July 2013
How to Lower a CBR 1000F
There are various reasons why you might like to modify the stance of a bike.
Streetfighter types like to raise the rear ends of their bikes because they think it looks cool. The reason they think it looks cool is that vintage special builders do this to decrease the stability of their machines for more responsive cornering (with the added benefit of increased ground clearance, which means the bike can be leaned over more, which also helps with cornering). And it does look cool (up to a point).
Drag racer types lower both ends of their bikes for arcane reasons to do with centres of gravity and moments of inertia. Basically, it makes the bikes less inclined to wheelie.
Off-road types like to raise both both ends of their bikes for better ground clearance over obstacles.
Adventure bike types also do this even though they don't generally need better clearance over obstacles. What they really need is to get their feet down securely to stabilise their heavy machines so lowering them might actually be a better way to go.
Which brings us to road-riders, who generally only lower their machines in order to better touch the ground with their feet.
I've been talking about lowering Big Honda for a while now and there are a number of reasons why I wanted to do this.
Firstly - Cosmetics. I like long, low bikes. If you have a bike that's already quite long, and you lower it, it looks even longer. I love that stretched street-bike look. I suspect it might be a bit dysfunctional, but as a look, it rocks! And at some point in the future, I may take Big Honda this far, but for the moment I just want it to be a little lower, and look a little longer without compromising it's useability too much.
 | |
|
 |
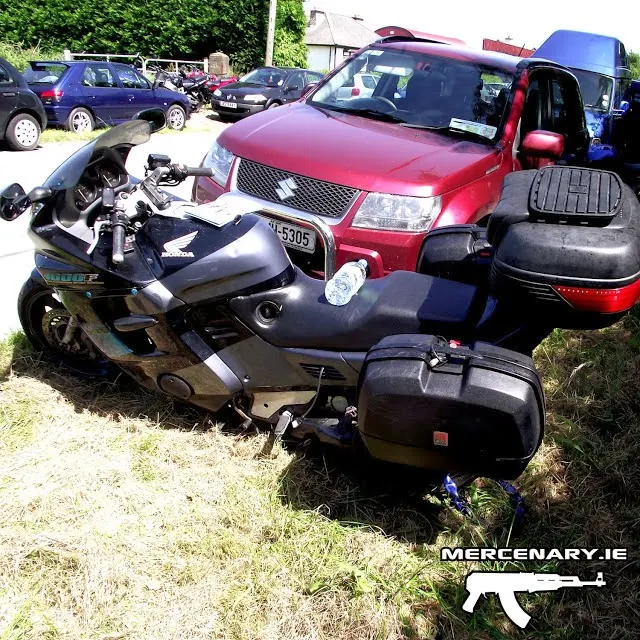
Big Honda's new stance.
|
You see, the CBR 1000F has clip-on handlebars and they're quite low. If you want to go fast (over 90mph) it's a pretty comfortable bike. But when you're not going fast, (which if you live in a city is most of the time) you carry too much weight on your wrists and the bars stretch your shoulders and neck.
When I first put the VFR clip-ons on, I fitted them so that they were flush with the top of the fork-leg as opposed to touching the top of the top-yoke (triple-tree). This raised them about another 10mm. So, my really convoluted reason for lowering the bike, was to bring the fork legs higher up in the top yoke which would effectively raise the bars.
In fact, the bars stay exactly the same height they've always been, but the rest of the bike is lowered under them.
 |
The new office. Note the GPS holder mounted on the filler cap bezel. More details on this Here
|
I could have just fitted handlebars which would have taken about the same amount of effort, but like I say, I just like low bikes. In fact, if I still get pains in my neck and shoulder, fitting handlebars will be my next move.
So how do you go about lowering a bike?
Well the front is easy, you just open the yokes and slide the forks up through them, then clamp the yokes up again. I'm oversimplifying this a little, but not too much. You need to have an idea of how much travel the forks have so the fork-sliders/mudguard/wheel don't hit the bottom of the yoke. And if your bike has handlebars (as opposed to clip-ons) you might only be able to lower the bike a little before the fork legs hit the bars. With clip-ons this isn't an issue. It's generally possible to lower the front up to about two inches using this method.
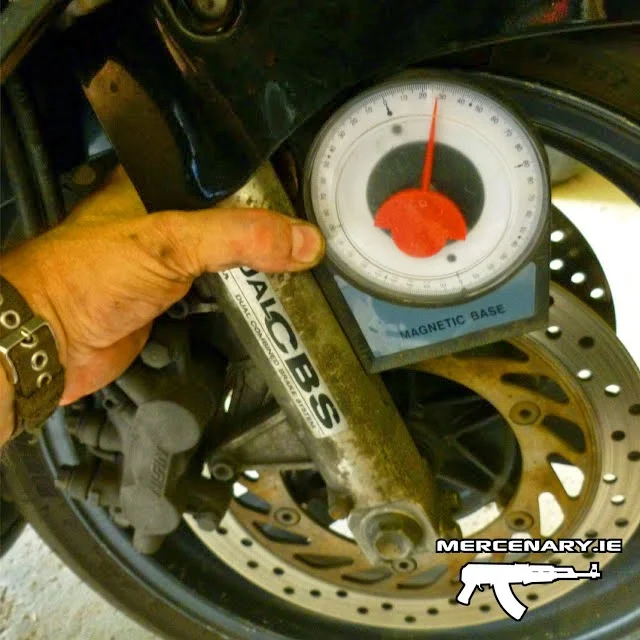 |
After lowering the rear,
sliding the forks up inside the yokes restores the rake angle to it's
normal setting of 27 degrees off the vertical.
|
How you lower the back depends on what kind of rear suspension you're dealing with. With a twin-shock setup you generally just fit shorter shocks, but you could relocate the shock mounts if you're a bit more adventurous.
This works with a Cantilever Monoshock too, but you might be lucky enough to have a shock that's adjustable for ride height. The Öhlins shock on my Superlight has a couple of inches of ride height adjustment.
All this stuff works on a Rising-Rate Monoshock too, but cutting and welding the shock mounts is a lot of effort - there are much easier ways. Replacing the shock for an adjustable (or shorter) one is relatively easy but quite expensive unless you're lucky enough to pick one up second hand. The generally accepted way to lower this type of suspension is to use an aftermarket lowering link.
These are easy to get for popular, late model bikes and are easy to fit.
My last couple of posts Here and Here deal with this in a bit more detail, but essentially, I wasn't able to get a lowering link for a CBR 1000F so I made my own. This dropped the back end by 30mm.
I then lowered the front by a corresponding amount by sliding the forks through the yokes as described above.
So now the whole thing sits a bit lower, except the handlebars, which are where they always were but feel like they've been raised. The geometry remains essentially unchanged and the suspension works the way it's always done (in other words, it's no worse, but there's still room for improvement). I've ridden it for a couple of days (including some off road trails on Sunday) and ground clearance isn't an issue. It'll still do kerbs and speed bumps without touching down. So from a useability point of view the bike is unchanged.
However, the bike looks cooler without looking like it's really low.
It feels nicer to ride - it's hard to describe, but Diane drove it and she said it felt better too.
And it's more comfortable - the extra 30mm height on the bars puts them pretty much where I want them to be. I'll be going for a long trip next weekend so it remains to be seen if they're comfortable enough...
 |
Does this make my boom look big?
|
#BigHonda #CBR1000F #CBR1000FTouring #Mercenary #MercenaryGarage
Monday, 29 July 2013
CBR 1000F Lowering Link - Some Useful Information
The newest CBR 1000F in the world is now about 14 years old while the oldest is about 26! They're exceptionally well built and they sold well from new so there are still plenty of them around.
Generally, aftermarket support for them is still reasonably good - for example, I was able to get a new Givi mounting kit for the Wingrack and a taller screen. However, there don't appear to be any commercially available lowering links.
There's lots of talk about this on CBR Forum about this but there's very little hard data. So here's my contribution...
Above is a sketch of the standard link from a 1994 CBR 1000F. Below is what it all means...
#CBR1000F #LoweringLink #Mercenary #MercenaryGarage
Generally, aftermarket support for them is still reasonably good - for example, I was able to get a new Givi mounting kit for the Wingrack and a taller screen. However, there don't appear to be any commercially available lowering links.
There's lots of talk about this on CBR Forum about this but there's very little hard data. So here's my contribution...
Above is a sketch of the standard link from a 1994 CBR 1000F. Below is what it all means...
- The Pivot length is 115mm (the bearing housing is slightly shorter than this)
- The Pivot Bolt is 10mm Diameter (M10)
- The Rising-Rate Pivot length is 90mm (In other words, the distance between the dog-bones is 90mm)
- The Rising-Rate Pivot Bolt is 10mm Diameter (M10)
- The standard distance between the two bolts is 120mm centre to centre
- Increasing the distance between the bolts by 12mm to 132mm centre to centre gives a drop of 30mm
 |
Ground clearance on the standard bike is 135mm (Approx 5 1/4"). Increasing the length of the linkage by 12mm (Approx 1/2") reduces ground clearance to 105mm (Approx 4 1/8").
|
#CBR1000F #LoweringLink #Mercenary #MercenaryGarage
CBR 1000F Lowering Link (Cont.)
A couple of weeks ago I did a post about making a Lowering Link for Big Honda... Here
It got cut short because I ran out of Argon. So here's the rest...
The shot above shows extended arms fabricated out of 25mm x 3mm flat bar, with the remains of the original bearing housing with the arms cut off. The holes on the left are 10mm diameter and will take a 10mm bolt to connect the linkage to the Rising-Rate Link. The holes on the right are also 10mm diameter, but their only function is to act as a jig during the welding process.
The shot above shows the whole thing assembled and tack-welded. The nuts and threaded bars are just to keep everything in alignment. It was at this point that I discovered that I'd no argon and couldn't finish the welds.
Above, the thing is welded and painted and the bearings, seals and bushes have been replaced. And this reveals a problem...
I had been wondering why the original Dog-bones were in fact dog-bone shaped? Why not just weld on the arms with big welds like I've done here?
Well, I suspect the answer is something like this. The original dog-bones would work reasonably well with no welding at all, and in fact, the welds holding them on to the bearing housing are little more than tack-welds.
My deep-penetrating welds are plenty strong and I'm not worried about them failing, but the heat from the welding process has distorted the bearing housing very slightly and the pivot is now much tighter than it should be.
It still works, but this is not the way to fabricate a lowering link. If I was doing it again (and I suspect I probably will be), I would do it differently. I'd do it the way Honda did it in the first instance.
#CBR1000F #LoweringLink #Mercenary #MercenaryGarage
Saturday, 27 July 2013
Friday, 26 July 2013
Adventure Stunt Touring
What the fuck?
That's right! For people who don't have the attention span to watch a clip about adventure biking, let alone do some actual adventure biking...
Some horseshit about Butch and Sundance and some stunts. I like stunting and I like adventure biking but this is pretentious, shallow and cynical.
FFS Dude, lay off the Red Bull!
#AaronColton #MotorcycleBolivia #Mercenary #MercenaryGarage
CBR Side-Stand Plate
Side-stands. You kind of take them for granted...
You casually pull up outside Spar, kick out the side-stand, lean the bike onto it, and go and buy a smoothie. You never really think about your side-stand. Day in, day out, kick-lean, kick-lean until the day comes when you have to park on wet grass...
Or worse, you park up on dry grass and then it rains and you return to find your motorcycle lying on it's left hand side in a pool of petrol, looking all forlorn.
There are solutions available. If you're an adventure-bike type, there are dozens of companies dying to sell you overpriced bits of billet-aluminum to bolt on to your side stand. Some of them are even shaped like a camel's hoof-print for stealthy parking in the desert (This is a true fact and not just something I made up).
Non adventure-bike types have to make do with something like this...
Furry animals are all well and good, but like a good Dostoyevsky novel, they're never around when you need one. So generally, I prefer to just weld on a larger foot made out of whatever bits of steel I can find lying around - No messing around with Muppets, expensive billet-aluminium farkles or Russian existentialists, thanks. All my dirt bikes have had this modification and my courier CX too.
It's not my idea, people have been doing this for decades. When Ted Simon went to pick up his 'desert ready' Triumph T100 for his 1973 'Round The World epic Jupiter's Travels, the only modification Triumph had made was to weld a plate onto the side-stand.
So the side-stand issue arose again on the camping trip to Kerry to. On the second night in Dingle, the pitch was too soft to park on so I left the bike on the road. I think the campsite owner would have preferred if we had parked on the pitch, and I'd rather have slept closer to the bike.
If I was using the CBR as a sportbike, I wouldn't bother with this. But Big Honda has been optimised for touring and stopping at the side of the road to take in the view and parking on campsites are part of it's mission. So it's worth making the modification.
I didn't have a camera in the workshop the day I did this so I don't have any pictures of the process but it went something like this.
*SAFETY NOTE!
Whenever I weld on a motorcycle, I always disconnect the battery. I don't know if this is true, but when I was a courier it was widely believed that electric welding would destroy alternators. I do know that if the battery is left connected it's possible to accidentally weld the points closed on older bikes. I also know that in the 'Long Way Round', one of the BMWs was arc welded in Mongolia and this killed the servo assisted brakes, disabling the bike.
So, to be sure, I disconnect the battery.
It's also worth noting that, most motorcycle batteries vent hydrogen gas and hydrogen gas is explosive. I've exploded two batteries by being careless - this is messy and dangerous because the batteries are full of acid. So if you need to weld anywhere near the battery, remove the battery entirely and put it somewhere safe.
#SideStandMod #CBR1000F #Mercenary #MercenaryGarage
You casually pull up outside Spar, kick out the side-stand, lean the bike onto it, and go and buy a smoothie. You never really think about your side-stand. Day in, day out, kick-lean, kick-lean until the day comes when you have to park on wet grass...
Or worse, you park up on dry grass and then it rains and you return to find your motorcycle lying on it's left hand side in a pool of petrol, looking all forlorn.
There are solutions available. If you're an adventure-bike type, there are dozens of companies dying to sell you overpriced bits of billet-aluminum to bolt on to your side stand. Some of them are even shaped like a camel's hoof-print for stealthy parking in the desert (This is a true fact and not just something I made up).
Non adventure-bike types have to make do with something like this...
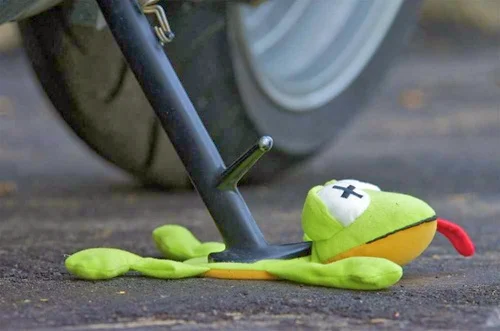 |
This is going to look rockin' under your
flat-black Hipster '76 CB750 with the pipe-wrap and the vintage
Firestones. Get one here kickstandkritters.com
|
Furry animals are all well and good, but like a good Dostoyevsky novel, they're never around when you need one. So generally, I prefer to just weld on a larger foot made out of whatever bits of steel I can find lying around - No messing around with Muppets, expensive billet-aluminium farkles or Russian existentialists, thanks. All my dirt bikes have had this modification and my courier CX too.
It's not my idea, people have been doing this for decades. When Ted Simon went to pick up his 'desert ready' Triumph T100 for his 1973 'Round The World epic Jupiter's Travels, the only modification Triumph had made was to weld a plate onto the side-stand.
So the side-stand issue arose again on the camping trip to Kerry to. On the second night in Dingle, the pitch was too soft to park on so I left the bike on the road. I think the campsite owner would have preferred if we had parked on the pitch, and I'd rather have slept closer to the bike.
If I was using the CBR as a sportbike, I wouldn't bother with this. But Big Honda has been optimised for touring and stopping at the side of the road to take in the view and parking on campsites are part of it's mission. So it's worth making the modification.
I didn't have a camera in the workshop the day I did this so I don't have any pictures of the process but it went something like this.
- Faffing around with bits of cardboard until I was happy with the shape. It's important that the foot 'tucks in' when the stand is up - I don't want it dragging on the road on left-hand bends!
- Cutting the shape out of a piece of 5mm steel plate.
- Tack welding it in situ with the stand still on the bike*
- Removing the stand from the bike to finish the weld.
- Painting it with black smooth Hammerite.
- Refitting it and checking that the side-stand interlock switch still works as intended.
 |
| Big Honda - Less turquoise every day... |
 |
The plate is designed to tuck in under the rider's foot-peg, without reducing ground clearance too much.
|
*SAFETY NOTE!
Whenever I weld on a motorcycle, I always disconnect the battery. I don't know if this is true, but when I was a courier it was widely believed that electric welding would destroy alternators. I do know that if the battery is left connected it's possible to accidentally weld the points closed on older bikes. I also know that in the 'Long Way Round', one of the BMWs was arc welded in Mongolia and this killed the servo assisted brakes, disabling the bike.
So, to be sure, I disconnect the battery.
It's also worth noting that, most motorcycle batteries vent hydrogen gas and hydrogen gas is explosive. I've exploded two batteries by being careless - this is messy and dangerous because the batteries are full of acid. So if you need to weld anywhere near the battery, remove the battery entirely and put it somewhere safe.
#SideStandMod #CBR1000F #Mercenary #MercenaryGarage
Thursday, 25 July 2013
Wednesday, 24 July 2013
Sahara Trip, Christmas 2008 (Part 4)
The 4th & final part of a solo trip I made to the Moroccan Sahara over the Christmas holidays in 2008
Part 1 is here... Sahara Trip, Christmas 2008 (Part 1)
Part 2 is here... Sahara Trip, Christmas 2008 (Part 2)
Part 3 is here... Sahara Trip, Christmas 2008 (Part 3)
The Trip Home is here... Africa Twin, The Trip Home
This was a pretty amazing trip. Apart from getting lost a couple of times, hassle getting in and out of Tangiers port and getting stuck in the oued, nothing went wrong.
And the bike? The bike was flawless. Comfortable, reliable, tough and trustworthy. When I first rode it I thought it was a big top-heavy monster and I was wary of taking it off road, but it really is an incredible off-roader. It's not just a styling excercise - it really was designed with that terrain in mind.
It's a pretty good tourer too but would benefit from an even bigger tank and maybe a better seat.
I had intended to return the following summer and ride the bike home, but circumstances changed and the bike has been in Italy for the last five and a half years. I've been back a few times and I've ridden it, but I never had the time/money to drive it back. I hope to go back and retrieve it over the coming weeks.
So, more to follow...
Part 1 is here... Sahara Trip, Christmas 2008 (Part 1)
Part 2 is here... Sahara Trip, Christmas 2008 (Part 2)
Part 3 is here... Sahara Trip, Christmas 2008 (Part 3)
The Trip Home is here... Africa Twin, The Trip Home
#AfricaTwin #RD04 #Mercenary #MercenaryGarage
Part 1 is here... Sahara Trip, Christmas 2008 (Part 1)
Part 2 is here... Sahara Trip, Christmas 2008 (Part 2)
Part 3 is here... Sahara Trip, Christmas 2008 (Part 3)
The Trip Home is here... Africa Twin, The Trip Home
 |
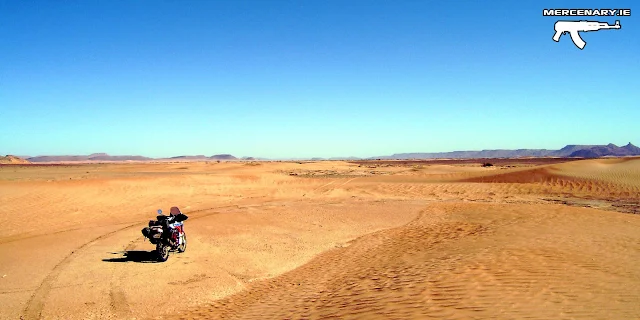
It's beginning to get sandier as I approach the Oued du Draa.
|
 |
But still good going and easy navigation.
|
 |
And becoming hot for the first time on the trip.
|
 |
| This took about two hours to extract! Read the story here... www.mercenary.ie/Stuck |
 |
After back-tracking about 5 clicks I eventually found a way to cross the river. I walked across first to make sure it was solid!
|
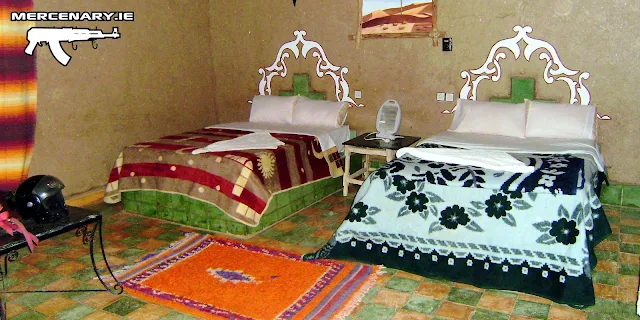 |
The 'Palais du Dunes' near Erg Chebbi. I highly recommend it!
|
 |
Early next morning. The end of the adventure and the beginning of the journey home.
|
 |
An English couple on BMWs are approaching in the background to the right of the picture. We chatted for a few minutes and they gave out about the woman's G650...
|
 |
Higher in the High Atlas. My Electric Jacket and heated grips took the discomfort out of this!
|
 |
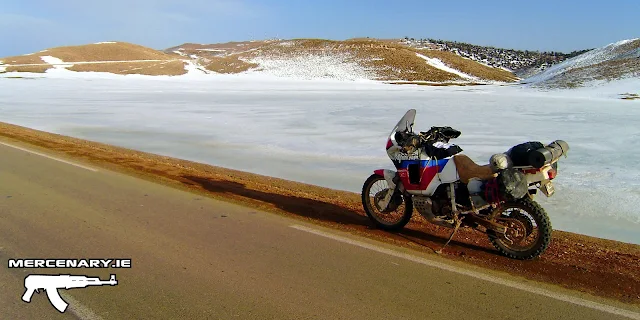
It's hard to believe this is Morocco and not Ireland...
|
This was a pretty amazing trip. Apart from getting lost a couple of times, hassle getting in and out of Tangiers port and getting stuck in the oued, nothing went wrong.
And the bike? The bike was flawless. Comfortable, reliable, tough and trustworthy. When I first rode it I thought it was a big top-heavy monster and I was wary of taking it off road, but it really is an incredible off-roader. It's not just a styling excercise - it really was designed with that terrain in mind.
It's a pretty good tourer too but would benefit from an even bigger tank and maybe a better seat.
I had intended to return the following summer and ride the bike home, but circumstances changed and the bike has been in Italy for the last five and a half years. I've been back a few times and I've ridden it, but I never had the time/money to drive it back. I hope to go back and retrieve it over the coming weeks.
So, more to follow...
Part 1 is here... Sahara Trip, Christmas 2008 (Part 1)
Part 2 is here... Sahara Trip, Christmas 2008 (Part 2)
Part 3 is here... Sahara Trip, Christmas 2008 (Part 3)
The Trip Home is here... Africa Twin, The Trip Home
#AfricaTwin #RD04 #Mercenary #MercenaryGarage
Subscribe to:
Posts (Atom)


