Try this One Weird Trick that Big Roadbook-Holder doesn't want you to know!
No Special Tools! Easy to Find Parts!
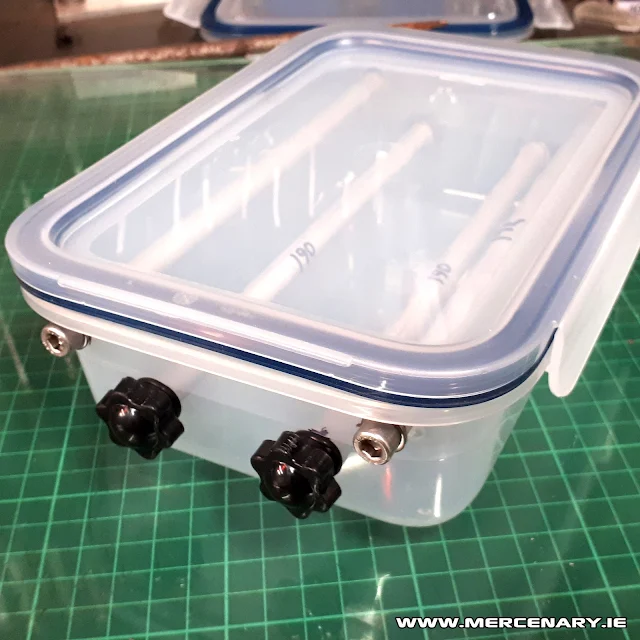 |
| The finished Roadbook Holder stored safely in a Secret Location. |
A few years back MERCENARY published a post on building a Roadbook Holder. That post is available here - https://www.mercenary.ie/2018/08/ikea-roadbook-holder.html
It wasn't really intended as a How-To and although all the parts were easily accessible, the tools used weren't. Since it was published, that post has recieved many hits, and it seems like there might be an interest in an inexpensive, quality roadbook holder that can be made using commonly available parts and simple tools.
So here goes...
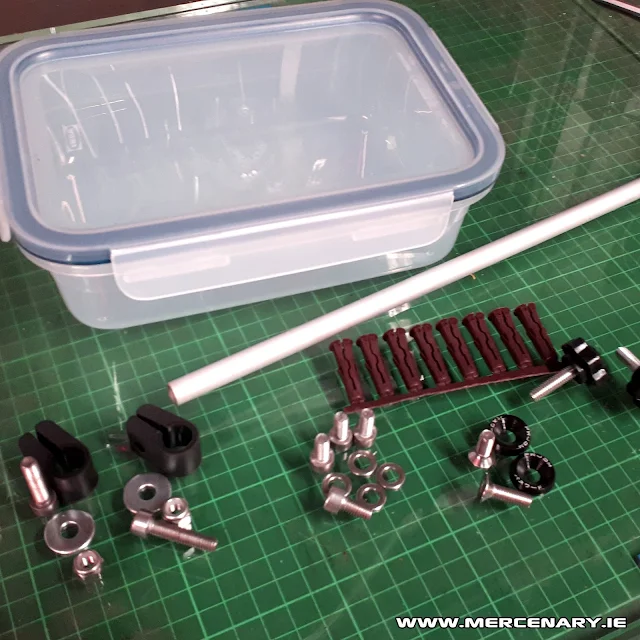 |
| The parts required to build the Roadbook Holder. |
PARTS.
1 No. Ikea 365+ 1 Litre Food Container. This is available from Ikea as a 3 pack.
1 No. Aluminium Tube OD 10mm, Length 1000mm. Available from the big DIY store in your local retail park.
2 No. M6 Knobs. Available from Amazon
6 No. M6 x 12mm Bolts - The length isn't critical, nor is the shape of the head. I used 4 no. stainless steel socket heads for the aluminium rollers 'cos that's what I had in the workshop, and 2 no. countersunk screws and washers for the scrolls cos I like how they look.
6 No. M6 washers to go with the 6 No. M6 bolts mentioned above.
8 No. 8mm (brown) Rawl-plugs - These are for the one weird trick!
4 No. ID 10mm O-Rings. These are optional but can be used to adjust the friction of the scrolls if required.
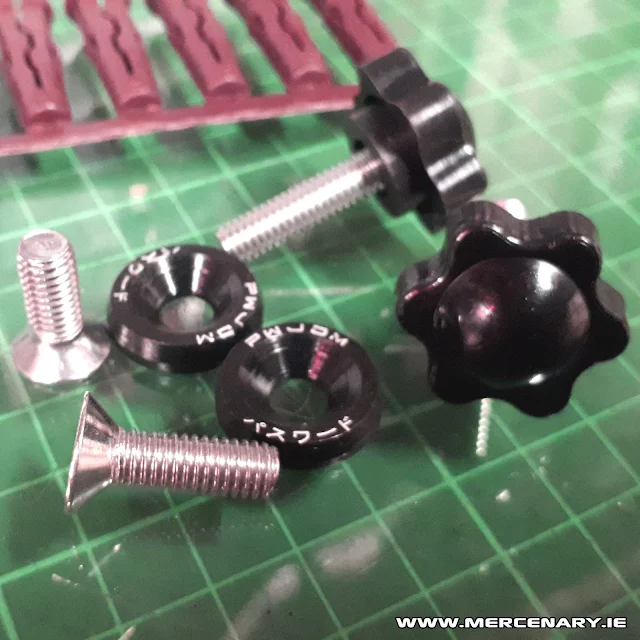 |
| M6 Knobs and M6 Countersunk Washers and Bolts for each end of the Scrolls. |
 |
| M6 x 12 Stainless Socket Head Bolts and M6 washers to keep the two Rollers in place. |
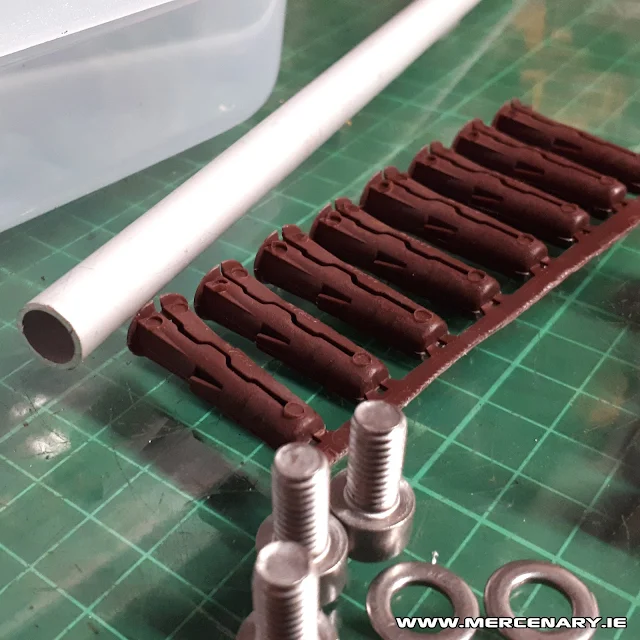 |
| Diameter 10mm Aluminium Tube and 8mm (brown) Rawl Plugs. The tube will be cut into four lengths.The Rawl Plugs will be inserted into each end of each tube before being drilled to 5mm. |
OPTIONAL MOUNTING PARTS
To Fit to a Handlebar Cross Brace...
2 No. Cable Cleats (10.1mm - 12.7mm). These are available from your local electrical wholesaler, or if you are in the UK or Ireland, Screwfix sell them (Part No. 985PV).
2 No. M6 x 40 Button-Head Bolts, 2 No. M6 Penny Washers and 2 No. M6 Nyloc Nuts.
 |
| Cable Cleats and M6 Hardware to mount the finished Roadbook Holder to a Handlebar Cross-brace. |
To Fit to a Navigation Tower...
4 No. M6 x 20 Bolts, 4 No. Penny Washers, 4 No. Regular Washers. 4 No. M6 Nyloc Nuts
To Fit to Some Other Flat Surface...
2 No. 20mm x 100mm strips of male and female self adhesive velcro.
TOOLS
You will need...
A way to scribe the plastic. I used an Awl for marking out lines and making punch-marks to centre the drill bits. If you don't have an Awl, a Steel Scribe will work and if you don't have a Scribe a Craft Knife or the sharp end of a broken Hacksaw Blade will work.
A way to cut the Aluminium Tube. I used a pipe cutter but a Hacksaw or even a Wood Saw will work (Wood and Aluminium have similar surface speeds so a wood blade will cut aluminium!).
A way to deburr the Aluminium Tube and the 10mm diameter holes. I used a round file on the holes and a Deburring Tool on the aluminium but a rolled up piece of sandpaper or a Craft Knife will work too.
Drill and Drill Bits (5mm, 6mm and 10mm).
A Steel Rule 25mm x 300.
MARKING OUT
We'll start by marking out the 4 No. 10mm diameter holes at each end of the Ikea 365 Container. The locations of the holes isn't critical, but it's important that the rollers and scrolls are parallel so each hole has to be mirrored exactly by it's coresponding number.
So rather than measure the positions of the holes, we'll use gauges where possible for repeatability.
Firstly, the holes for the scrolls.
 |
| Place the Steel Rule on the upturned edge and scribe a line along the top of the Rule. |
Remove the lid and place the box upsidedown on the worktop. Place you Steel Rule on the rim of the box and scribe a horizontal line along the top edge of the Rule. This should give you a scribed line parallel to, and approximately 25mm from, the underside of the rim.
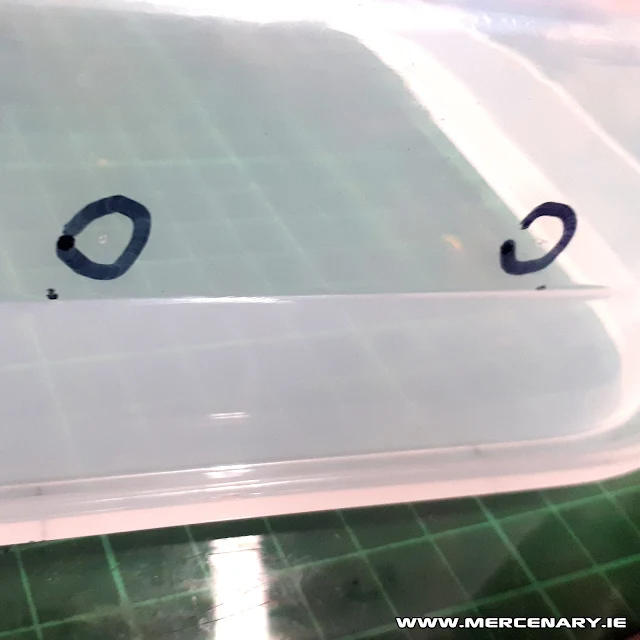
Next, take your alumium tube (a square section would make this easier, so if you have a piece of box section or angle, use that instead) and place it along the long edge of the box. Butt the Rule up against this, and mark your scribed line at 50mm and a 100mm.
 |
| Mark each point with a marker for clarity and make a punch mark. |
Mark each point with a marker for clarity and make a punch mark. Repeat for the other end of the box making sure to measure off the same long edge.
Next, the holes for the rollers.
The rollers should be located about 6mm from the underside of the rim. So find something about 6mm thick that you can use as a gauge. I used a 6mm T-Handle Allen Key, but use what you have (maybe a screwdriver?).
With the gauge lying on the underside of the rim, scribe a line parallel to, and approximately 6mm from the rim. Repeat this for the other short end ol the box.
 |
| With the gauge lying on the underside of the rim, scribe a line parallel to, and approximately 6mm from the rim. Repeat this for the other short end ol the box. |
Next, turn the box onto its long edge and place the Rule on the worktop andscribe a line along the top of the rule. This should give a line parallel to, and approximately 25mm from, the worktop.
 |
| Turn the box onto its long edge, place the Rule on the worktop and scribe a line along the top. |
Repeat to find the position of the other 3 roller holes. Mark the holes with a marker and make punch marks to stop your Drill Bit from wandering.
Next, using your 5mm Drill Bit drill a pilot hole at each of the eight points you've marked. In the interest of accuracy, you should drill perpendicular to the surface to lessen the chance of the Drill Bit wandering.
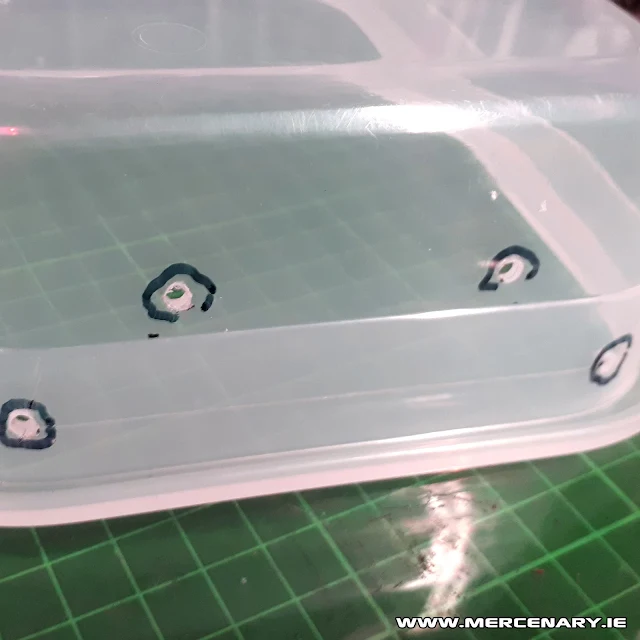 |
| Drill perpendicular to the surface to lessen the chance of the Drill Bi wandering. |
Next, using your 10mm Drill Bit, enlarge the pilot holes. This time drill parallel to the edges of the box, not perpendicular to the surface.
Now, deburr the holes and that's the first piece finished
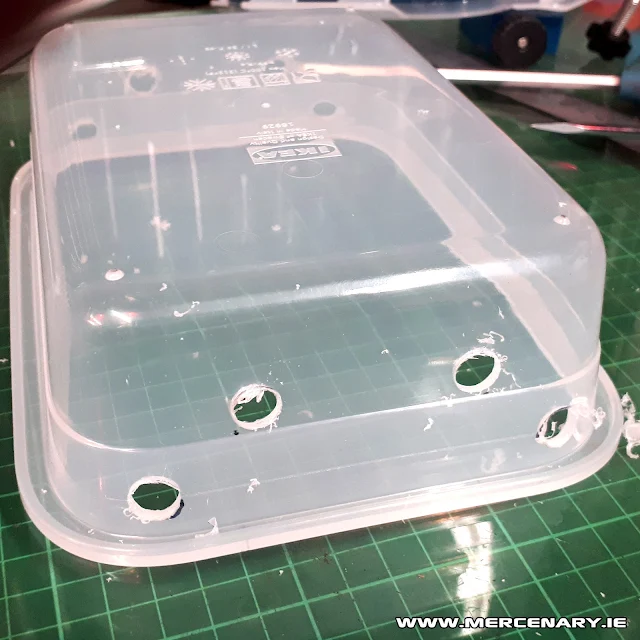 |
| Using your 10mm Drill Bit, enlarge the pilot holes. This time drill parallel to the edges of the box, not perpendicular to the surface. |
Next, cut one of the flaps off one of the short sides of the lid. That's two pieces finished.
 |
| Cut one of the flaps off one of the short sides of the lid. |
Next, cut the aluminium rod into two lengths of 190mm for the scrols and two lengths and of 192mm for the rollers. Mark them with a marker or a piece of tape or something so they don't get mixed up. Then deburr the inside and outside edges. You should be able to do this with the point of a craft knife. An 8mm drill bit should work too.
This is the One Weird Trick...
So take your 8mm Rawl Plugs and cut the flashing off the flanges to tidy them up. Then insert a Rawl Plug into each end of each of your four aluminium tubes. The first three quarters goes in easily. Tap the end of the workbench to drive the last bit home.
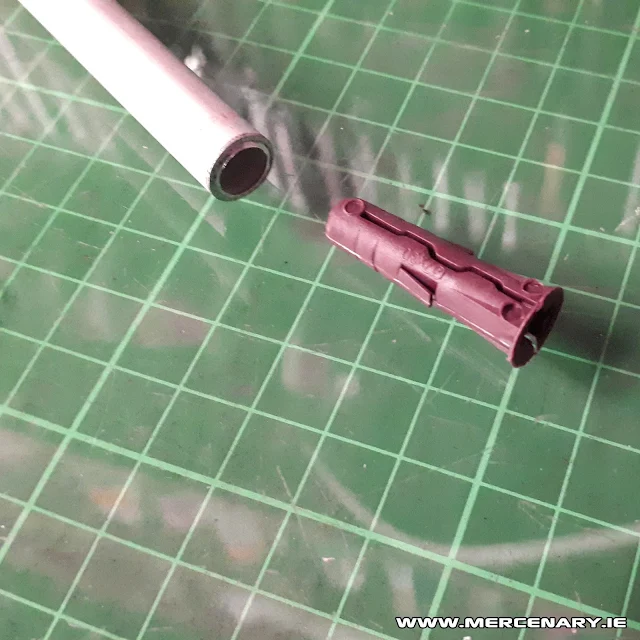 |
| This is the One Weird Trick! |
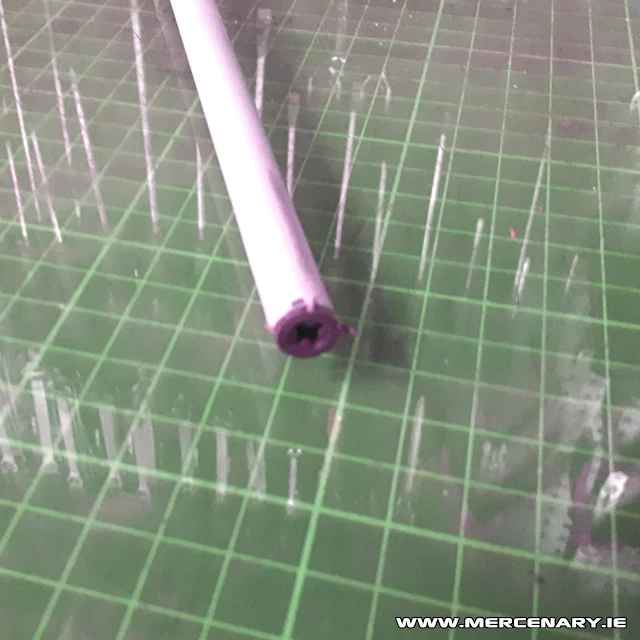 |
| It's better to cut the flashing off the flange before this stage, but whatevs... |
Next, holding the tube in a vise (or at least a pliers) drill out the centre of the Rawl Plug with the 5mm Drill Bit. If the Rawl Plug starts to spin, hold it (and the end of the tube) with a pliers. If you're still struggling, consider wrapping the end in tape or perhaps gluing the plug in place. Adapt and overcome!
 |
| Drilling out the Rawl Plug with the tube held in a oh look, a squirrel... |
Now, fit the appropriate hardware to one end of each tube. The short (190mm) scroll tubes get a M6 Knob at one end and a M6 Bolt and Washer at the other. I used fancy countersunk washers and countersunk bolts, but regular washers and bolts will work fine too.
The long (192mm) roller tubes get regular bolts and washers.
So start at whichever end you like and screw that into the 5mm bore in the Rawl Plug. The bolt will cut its own thread as it goes. After you've fitted one end, pass the tube through the appropriate holes in the container before fitting the corresponding end.
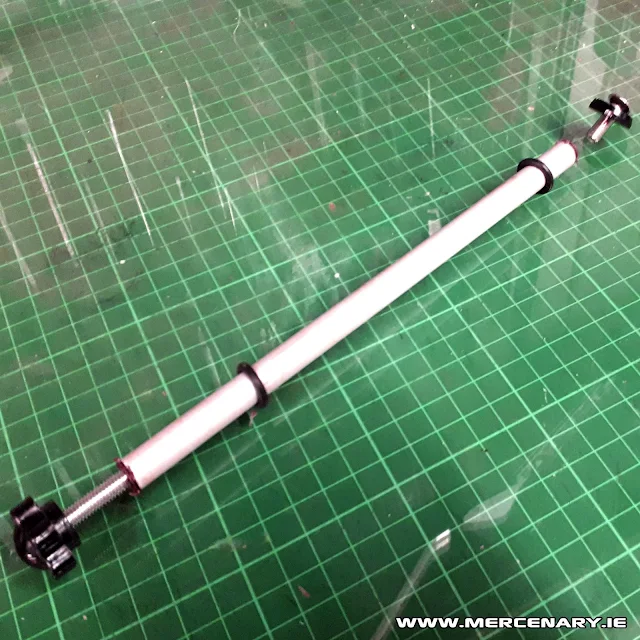 |
| The first scroll ready for assembly. |
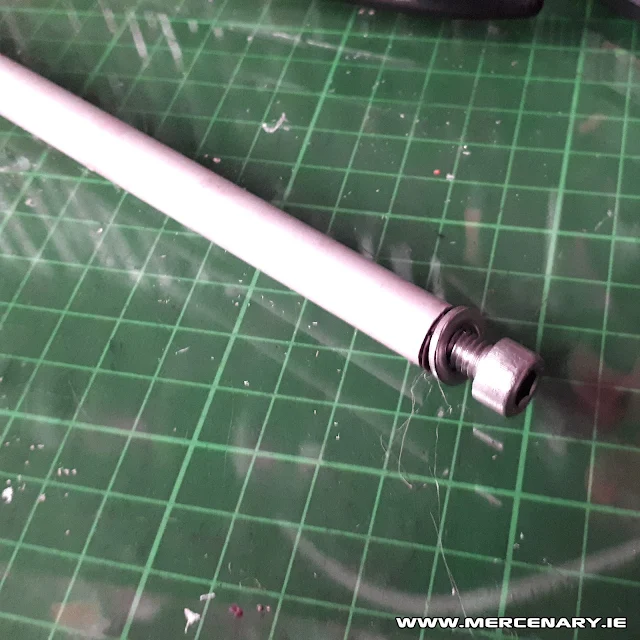 |
| The first roller ready for assembly. |
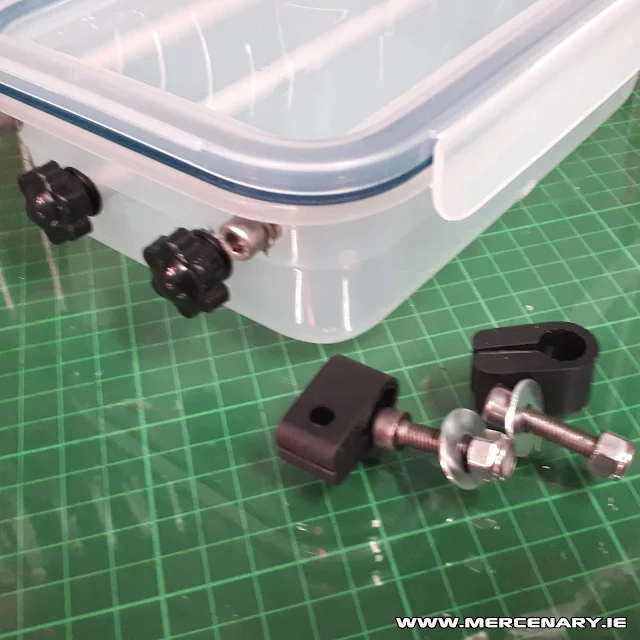 |
| The finished roadbook Holder ready to mount to the handlebar crossmember. |
So that's it. The Homemade IKEA Roadbook Holder is finished. All that's left is to figure out how to mount it. If you're fixing it to a navigation tower, offer it up to the tower and with a marker, transfer the bolt pattern of the tower to the base of the Roadbook Holder. Then drill the holes and fix it to the tower with appropriate bolts, washers and nyloc nuts. Consider using penny washers on the inside of the Roadbook Holder to spread the load over a greater area of the relatively weaker plastic.
You could also use strips of velcro to mount the Roadbook Holder to the navigation tower. This would have the advantage that the Roadbook Holder could be removed easily, and the Roadbook loaded indoors, seated at a table say.
However, it's likely that if you are building a home made Roadbook Holder out of an Ikea lunchbox, it's because you are only starting out at Rally Raids/Navigation Trials and you probably don't have a navigation tower. Never fret, MERCENARY's got you covered...
The following guide shows you how to mount the Roadbook Holder securely on the cross-brace of your 22mm handlebars (if you have 28mm bars with no cross-brace you'll have to figure something out for yourself).
 |
| Keep the line marking the holes parallel with the long edge of the Roadbook Holder. |
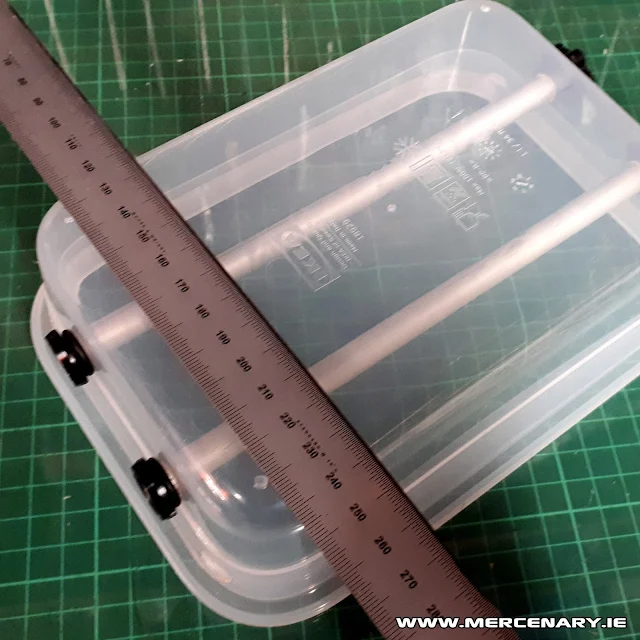 |
| Align the Steel Rule against the studs and scribe a line along the inside edge of the rule. |
 |
| The Roadbook Holder fixed to the cross-brace with the Cable Cleats. |
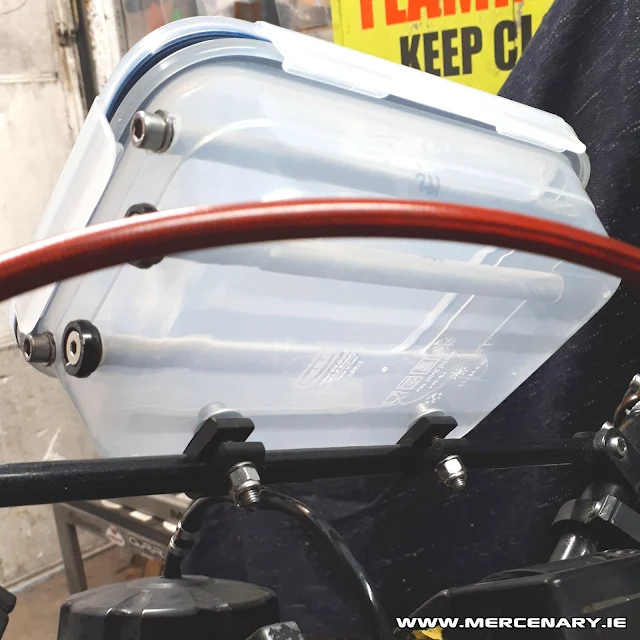 |
| Don't overtighten! The Cable Cleats will grip the cross-brace with minimal tension. |
 |
| Adjust the side-to-side position and the angle of the Roadbook Holder until you're happy. |
 |
| The MERCENARY KLR ready for some more Navigation Trials. |
Images - Mercenary Garage
#IKEA #IKEARoadbookHolder #HomeMadeRoadbookHolder #OneWeirdTrick #DIYRoadbookHolder #GhettoRoadbookHolder #MercenaryRoadbookHolder #OneDayBuild #RoadbookHolder #RallyRoadbookHolder #EnduroRoadbook #KLR250 #StealthKLR #Mercenary #MercenaryEngineering #MercenaryMotorcycles #MercenaryGarage #RoadbookScroll

Very helpful, thank you.
ReplyDeleteWelcome!
Delete